How To Make Amazing Videos On A Tight Budget

People often assume that making videos that are above amateur quality needs to cost serious money and can only be done by "pros."

Nothing is farther from the truth.

With the right know-how, you can create a standard repeatable process and create videos of your own, not just simple videos either!

Your current skills and equipment can give you the videos you need to attract the right audience. Or at the very least, skills and equipment you can get for meager prices.


We are here to dispel the myth that video creation is hard and costly.


Our guide is for marketers like you, with a small team that has little to no experience. It is also for creative video managers that have no gear to use or are on a tight budget and schedule. We're here to guide you through the process.

First thing's first, however. If you already have an expert on-board, like a video editor on retainer, or an agency for your ads and marketing, you don't need to remove them from the equation. The strategies we are recommending can complement your existing personnel's efforts. This guide can tackle the bulk of your video campaign, the more straightforward videos that will reach most of your audience regularly. All while your expert or agency deals with the significant production efforts. 

So what is the objective of this video production strategy?
The end goal is to be able to fully utilize this channel that allows you to communicate fully to your audience. Videos can convey different ideas and emotions effectively and are a valuable asset in a marketing campaign. Our guide will help you create stunning videos without breaking the bank, and using as little equipment as possible. Perhaps even stuff you already have and do not know are capable of giving you the results you need.

We will layout the process from pre-production to the production of the video, all the way to post-production and rendering. In addition to this, you'll be getting a lot of tips and tricks that will augment your marketing efforts and give you as much marketing ROI as possible. 

Without further adieu, this is our guide to creating stunning videos on a tight budget: 

The Budget, The Team, The Gear, & The Software

Before you begin planning your video production strategy, it is essential to answer a few simple questions to set the parameters of your efforts. 

- What is my budget?


- Who will be my primary team?


- What are they capable of?


- What equipment and software are best for their skillset?

Answering these four critical questions can maximize the money, time, and effort you will pour into your video creation strategy. The last thing you want is to buy too much equipment and software that is too complicated to use for your team, or go the other route and get very simple tools when your organization needs more.

Our guide will help you answer these questions! 

What is my budget?

Perhaps the most important of all questions, knowing how much money you can allocate for this endeavor will also determine the answers to the other questions. But how then can you know exactly how much to spend? 

It depends on how much existing gear and personnel you already have on-board your team. But to help you answer this question here is a check-list: 

-Of your current team, who can you pull aside to do this? Or do you need to hire a new person?


- Do you already have basic equipment like cameras, laptops, and microphones?


- Is your existing marketing team capable of creative video ideas? Do you have multiple people for your creative team, or is it one jack-of-all-trades?

You can also use this simple configuration list to help determine how much money you’ll spend on this effort: 

1.) Basic Team - Capable of churning out streamlined videos but perhaps at a slower pace, this kind of team could be composed of just one or two people who will be doing multiple tasks like creating the strategy, shooting the footage, editing, and so on. Teams of this nature will be more inclined to doing videos that have a more natural feel to it due to having minimal personnel. Or when tasked to do more complicated videos, it will produce them at a slower pace. The main advantage is this team is the least costly. 

2.) Intermediate Team - This team can be composed of around five people, with two to three video producers, a specific pair of people who can shoot footage, and one creative who can think of the primary strategy, copy, and style. With the tasks distributed to several people, the intermediate team is capable of producing videos of good quality at a faster pace. And if it is needed, it can create even more stunning videos and finish at a decent time. This costs a little bit more, though, especially if new personnel is added to the team.

3.) Advanced Team - An advanced video production team included at least one person for each specific task necessary for the video-making process. Everything from copywriting, to storyboarding, to sound and camera use, makeup and costume, post-production editor, and special effects artist can be part of the team. The size depends on the people that can be pulled from the existing squad or added from outside the organization. Whatever the number, however, this team is the most capable of producing the highest-grade in-house videos, but is also the team that will stretch a tight budget to its limit.

Whatever team is created, however, the organization is the same: it starts with the video producer, goes through the writer, passes through the creative team of director, camera, and audio guys, and finally, the video editor who will finish it all. 

Now, if you are unsure how to compose your production team, an option is to hire freelancers or independent contractors. This could prove to be more costly, but they are already experts and can be used for one-off or a limited number of videos. If you plan on producing video content, however, having your in-house team might be the more cost-effective choice.

Once you can answer what kind of team you want and a wide budget range you can afford, the next task is to find out what they are capable of.

Who will be on my team, and what are their skills?

This one won't take long to figure out, as if you're using existing people from your company, then you already have a general idea of what they can do. Even if those skills are not directly for video production, existing skills can all be tweaked to benefit the overall strategy. 

The most obvious choice for a video producer is a manager or a team leader. Able to see the big picture, this person can use their existing skills in organization and macro-management to oversee the entire process.


A copywriter for your print or online ads can be the copywriter for video ads.


Graphic artists, even those not familiar at all with video-editing software, can train and adapt easier over time than others.


A  designer or layout artist can be the cameraman, as their keen eye on how things frame also benefits video shooting.

With your in-house team now ready, it’s time to decide what kind of equipment and software you should get to get your videos started!

What equipment and software are the best for my team?

To answer this question, you have to go back to the answer to the first three questions: what is your budget, who is in your team, and what are their skills. This is to ensure that you don't end up getting too much gear, they are not skilled enough to use, or too little equipment that is simple and have to be shared by multiple people. It also depends on what kind of videos you are planning to produce. More guerilla, personal videos can do with being shot with a phone camera that is shaky or has basic lighting. Higher quality videos that will be shot in slow-mo at high-definition and will make use of chroma keying requires more advanced tools.

Fortunately, technology has advanced so much that even a simple smartphone can do multiple jobs already. So, let’s get started with that for the beginner team gear recommendation. 

Beginner Team Equipment Suggestion

- Smartphone (already exists in your business/company)
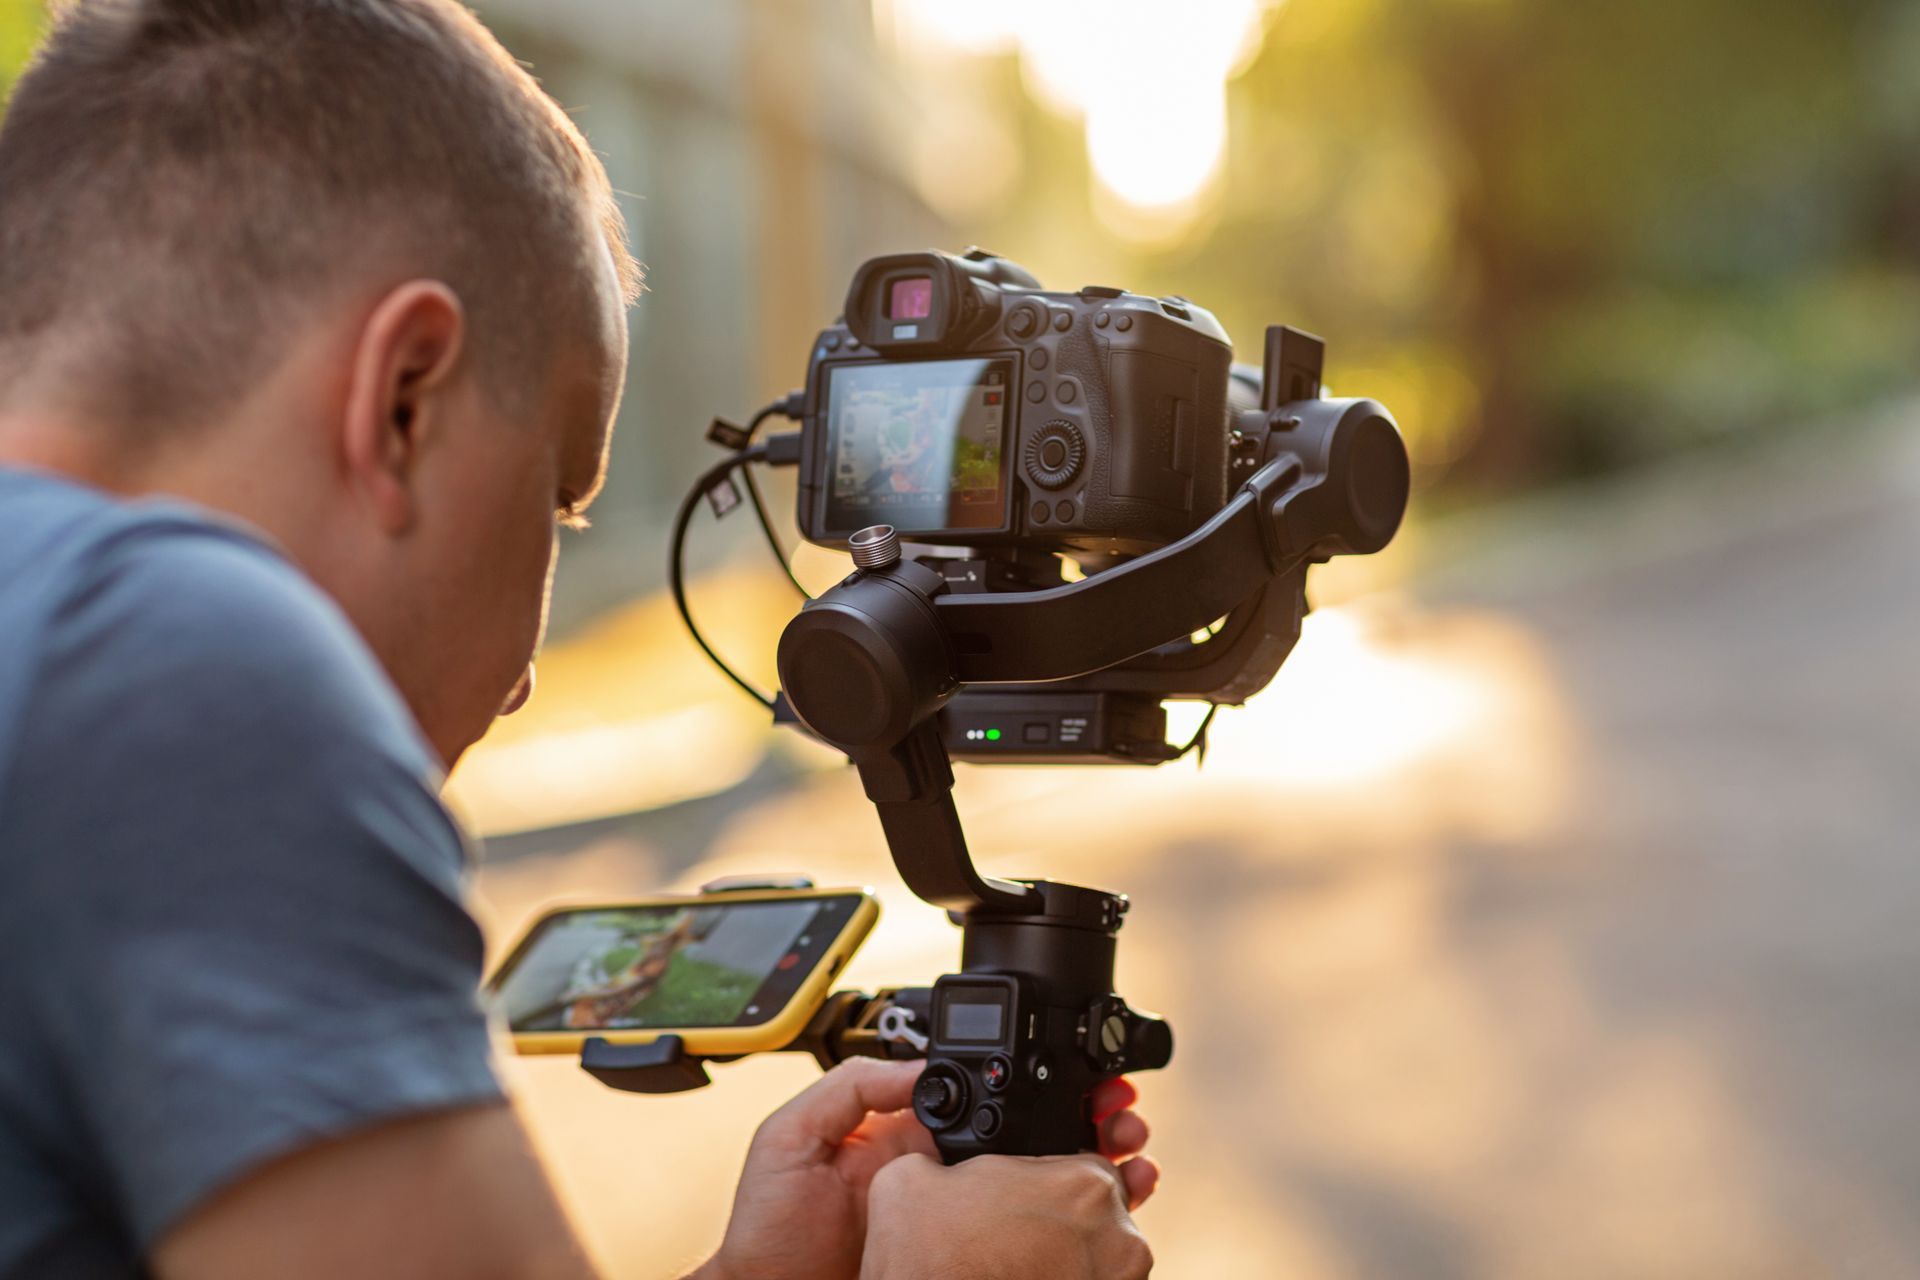
  - Tripod or gimbal


  - External microphone


  - Selfie light - Laptop/Desktop (already exists in your business/company)


- Estimated total cost: $200 to $250 (or $500 to $1,000 if buying a new smartphone and/or desktop/laptop)

Smartphone

A smartphone is recommended both as a camera, microphone, and even a video-editing device. The quality of the video produced depends on the quality of the smartphone itself. But with nearly countless models out on the market, having a smartphone whose specific focus is to shoot high-quality videos is the best option.


Of course, for a beginner team and definitely for a tight budget, an existing company phone is an option. To make it an even better video recording device, you can add accessories like lenses and microphones that are bought for meager prices. You can also buy a simple phone gimbal to shoot videos with little to no shaky effects.


The main advantage of the smartphone is that it requires very little skill to use. Anyone who already has a smartphone already knows how to point and shoot videos. It will only take a minimal amount of adjustment todo so in a way that fits your video production strategy.

Pros of using a smartphone

-Easily accessible
- Very easy to use
- Adaptable with different accessories
- Ubiquitous and already exists in your company 

Cons of using a smartphone

-Quality of video varies per phone
- Storage space depends on phone and SD card
- Video apps have limited capability 

While a smartphone is a powerful tool, because it is a device that serves multiple functions, certain adjustments have to be made to produce the best quality video possible. For example, the right lighting has to be achieved, so this usually means more artificial lights or shooting during the day. 

To compensate for a smartphone’s shortcomings, you can also purchase and use different accessories. 

Smartphone Accessories

A selfie light or a ring light can be used beyond just selfies. It can be used as a general additional light source to be able to film in low-light conditions. A tripod is an excellent tool to shoot videos on a stable platform, like when filming a team meeting, a video podcast, or vlog. A gimbal is excellent to have to record videos stably and can give the appearance of being shot by a professional. 

But all of these are nice-to-haves. The real essential piece of additional equipment is a good microphone. There are many kinds of mics that serve different needs, but an external mic often does what the built-in smartphone mic can’t: reduce or eliminate background noise. 

Lastly, a video filming app can also enhance the way you shoot and record your videos. Most smartphones will have limited options when shooting a video using the default camera app. A3rd party camera app can give access to different options such as filters, shutter speeds, brightness and exposure levels, and so on. Combined with an external lens, you can turn a simple smartphone to a camera that can give you videos suited for stunning content. 

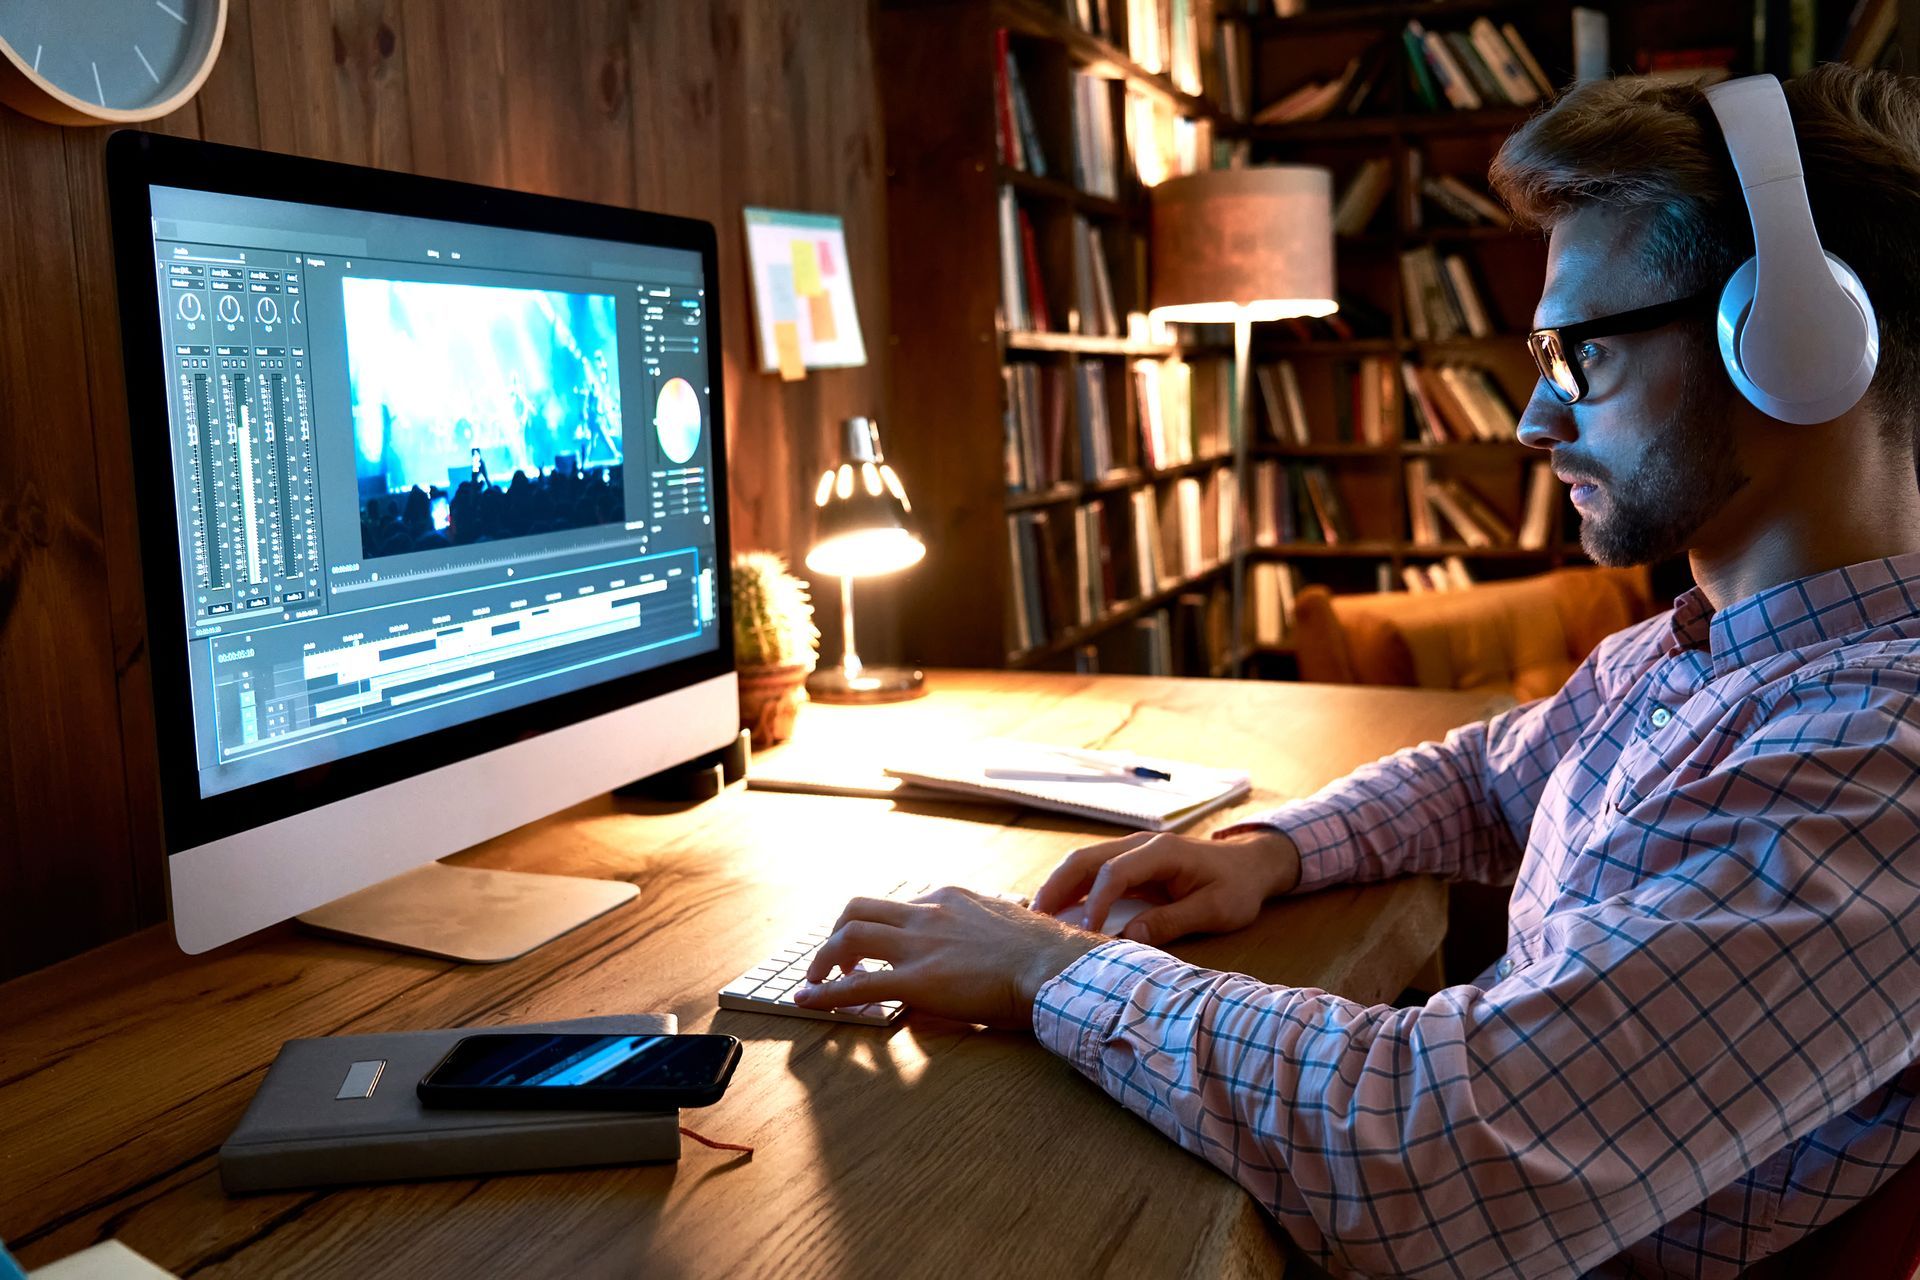
Laptop/Desktop and Editing Software

A laptop and/or desktop is as ubiquitous as a smartphone, especially in offices. And just like a smartphone, this piece of equipment can be used for not only video editing but also for video recording. This is because most laptops and desktops already have webcams included, and these webcams are very useful. They can be used to record talking head videos, vlogs, video podcasts, webinars, and so on. Not only that, but a laptop or desktop computer is more powerful than a smartphone, and has access to an assortment of video programs smartphones don't have. 


Pros of using a laptop/desktop

-Already probably exists in your company or business
- Powerful and capable of better video editing
- Well worth the money

Cons of using a laptop/desktop

-Not as mobile as a smartphone or regular camera
- Requires a bigger space to use
- More tedious to set up shots at the right angles and with proper lighting

A laptop or desktop is an invaluable tool for video production, but not necessarily as a video camera. While a webcam can have better quality than a smartphone camera, it is also limited in that it needs to be close to the laptop or desktop. So this can make shooting videos in different locations a difficult task when compared to a smartphone on a tripod. 

Just like a smartphone, the laptop's microphone is also not as good as an external one. Most vloggers who record on their laptop or desktop use an external mic on a stand. Not only does it function so much better, but having the microphone visible on videos like webinars or podcasts can make the product look much more professional.

Another advantage of a laptop/desktop is that video editing can be done faster and with more options than a smartphone. While there are some professional-grade video-editing apps for smartphones that have more options than most of the built-in video-editing apps, it doesn’t hold a candle to desktop counterparts like Adobe Premiere or Final Cut Pro. Even basic video editing tools on desktops like iMovie can be used so much easier than a smartphone’s app.

The good thing about the beginner gear set, however, is that you do not need to choose between using a smartphone or a laptop/desktop. Since the beginner gear set is for a tight budget and limited personnel with limited skill sets, you can use both in tandem. Shoot videos on both your smartphone and desktop and use the desktop to edit the footage for the final output. 

Intermediate Team Equipment Suggestion

 - DSLR camera


- Tripod and gimbal


- External microphone


- Softbox or umbrella lights


- Laptop/Desktop


- Estimated cost: $1,000 to $1,500 (or up to $2,000 if getting a new laptop/desktop)

The intermediate team's suggested gear and equipment are similar to the beginner teams, except for one key difference: the camera. 


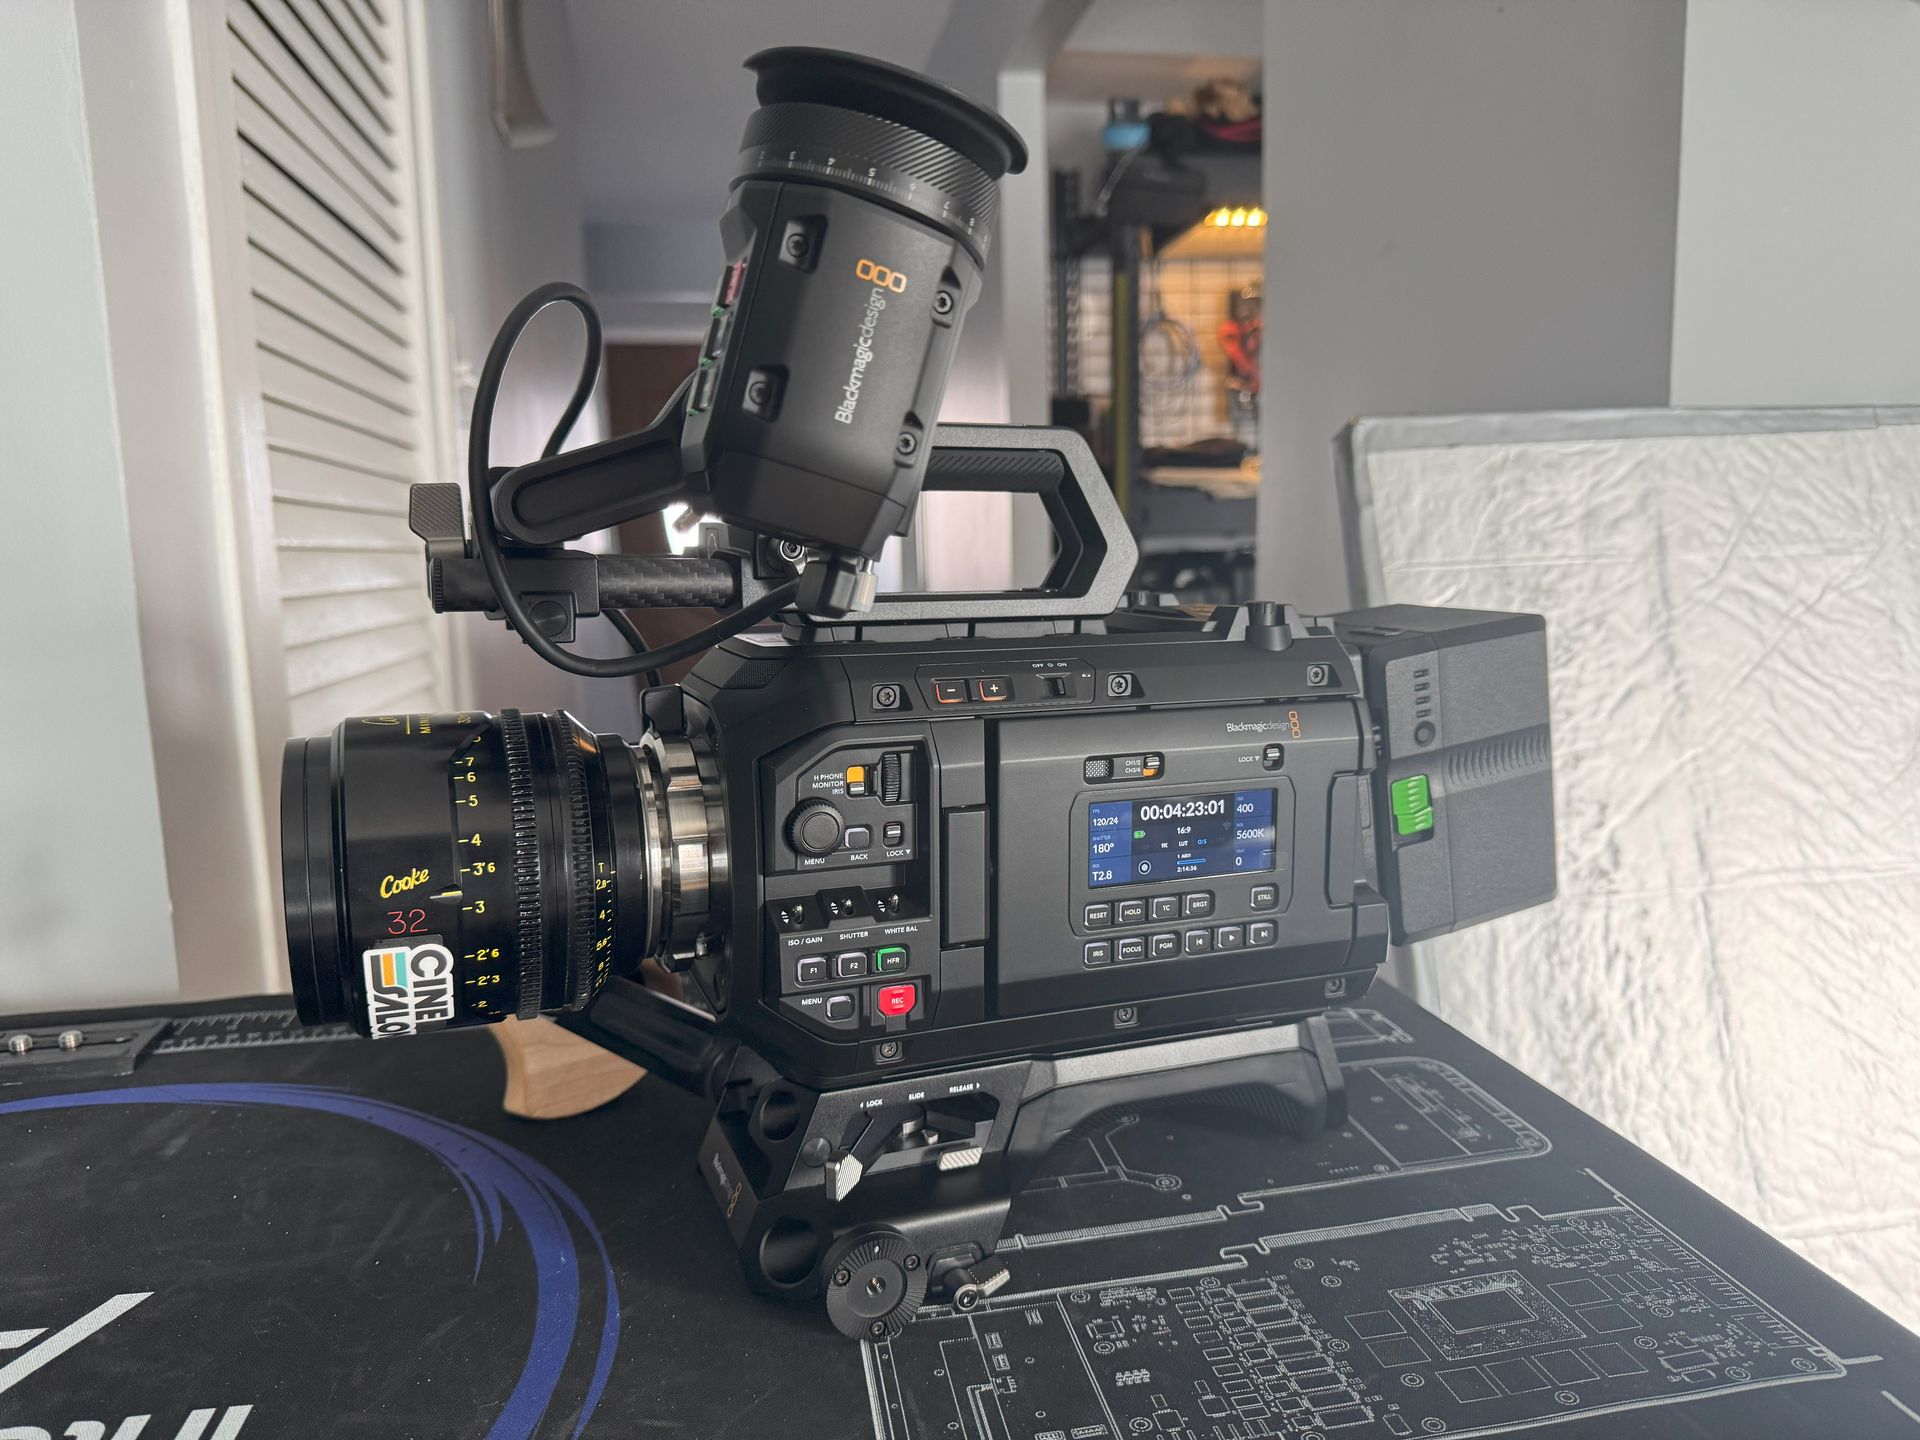
A  DSLR or digital single-lens reflex camera ups the ante and quality of the videos your team shoots. Keep in mind, however, that if you decide to get a DSLR camera, get one from this year. Even a mid-range DSLR camera will produce better quality videos than a higher-end camera that is sold second-hand for cheap but is from 6 or 7 years ago.

Pros of using a DSLR camera

- Specifically designed to shoot high-quality videos and pictures


- Versatile and offers full control of videos and images


- Can easily adjust to different lighting conditions

Cons of using a DSLR camera

- Can have a high learning curve to use fully-Isn’t as portable and easy to carry as a smartphone-Needs external software to do comprehensive video editing.

The main advantage of using a DSLR is that it gives absolute control over the videos captured. It’s done by having a lot of controllers capable of adjusting the camera for different lighting situations. 

Another advantage is that some DSLRs don't cost any more than a high-end smartphone. If you are looking at getting a high-end smartphone just for its camera capabilities, chances are you can get a DSLR with better video capabilities for the same price. Maybe even a bit less. So when that happens, it's always better to pick the DSLR. 

However, because a DSLR is specialized for videos and photos, and have a lot of different options, it can take a while to learn how to fully use it, especially by someone who has no familiarity with photography and videography. While there are some fixed or automatic settings in most DSLRs that can assist the user and do the thinking for them, doing so usually doesn't maximize the full potential of the camera. So it pays to have your cameraman learn how to use the DSLR better if they don't already know-how. 

Another disadvantage is that unlike a smartphone, most DSLRs will need to transfer their videos to a laptop to even basic video-editing. Having to transfer the videos to a laptop before it can be quickly edited and uploaded takes time. This makes DSLRs not suited for simple video content that needs to be edited and uploaded fast because a smartphone can do that job better. 

For everything else, however, DSLRs reign supreme over smartphones. And as such must be included for the intermediate team's gear set. 

And you can enhance a DSLR even further with additional equipment, just like how you would with a smartphone.

A tripod is a must-have when shooting from a static position. Often this is done when shooting a video for a vlog, webinar, video podcast, or a how-to guide. A DSLR gimbal is much more expensive and bulky than a gimbal for smartphones. However, having one will definitely up the quality of your videos, especially when shooting scenes that require a lot of camera movement. 

While a DSLR can adjust to different lighting conditions, having light softboxes and umbrellas allows you to shoot videos at a higher quality with very little noise or pixelation. This is ideal for webinars and video podcasts and makes the video look much more professional than merely using office lights. The difference between the two is quite minimal, with softboxes producing more diffused light similar to sunlight entering a window, and umbrellas creating more spread out but direct light. Having one type or both depends on your budget and video requirements. 

But if there is one thing that you need to get for your DSLR camera, it's an external mic. Just like a smartphone, a DSLR's built-in microphone isn't as good as an external microphone. Having one attached to your DSLR will give better audio recordings, eliminating background noise in the process.


Many kinds of microphones will suit any of your needs; you need to pick the ones for your videos. For example, if you plan on shooting webinars on a stage or office where the camera is stationed far to show a large screen, board, or space, then a wireless lapel microphone can be used by the speaker. If most of your videos are vlogs or talking-head videos recorded up close and personal, a microphone on a stand works best. Whatever you pick is most certainly much better than the DSLR microphone. And while it adds cost, the money you'll save when it comes to editing the audio on post-production will more than pay for the additional microphone.

Speaking of editing software, you can use the same software that you would for the basic team gear set. However, if you’re going for intermediate gear, you might as well invest in professional video editing software. While Windows Movie Maker or iMovie is enough if you need to cutdown on costs, software like Adobe Premiere or Final Cut Pro are necessary to elevate your post-production quality. It allows you more editing options, various filters, and so on. 

You'll need a laptop or a desktop to use these software. Fortunately, unless you are shooting 4Kquality videos and plan to add a lot of special effects, you don't need a powerhouse laptop or desktop for video editing and rendering. Chances are, your basic office laptop is capable of doing this task already. However, it does help if your computer has a substantial amount of RAM (like around 8 GB) and a proper GPU to assist in the video editing process. The more powerful the computer, the faster you can edit and render, and the more videos you can produce within a period. 

These editing software, however, unlike Windows Movie Maker and iMovie, can take some time to learn in order to maximize its potential fully. This is why it is imperative when forming an intermediate team that there are one or two people assigned explicitly to video editing and post-production. And as mentioned earlier, even if they are not trained to do so at the start, an in-house person who has experience in other editing software can learn faster than others. For example, a graphic artist well-versed in Adobe Photoshop can pick up Adobe Premiere relatively quickly. So while the software is pro-grade, it can still definitely be used in-house by an experienced employee. 

For the most part, if the budget and the personnel allow for it, we recommend that an intermediate team be formed for those looking to regularly produce video content as a significant part of their marketing strategy. If you want to make it your entire marketing strategy, however, or if you wish to include it as a significant part of your business, then an excellent team is necessary. It will, however, require a bit of investment to do so. 

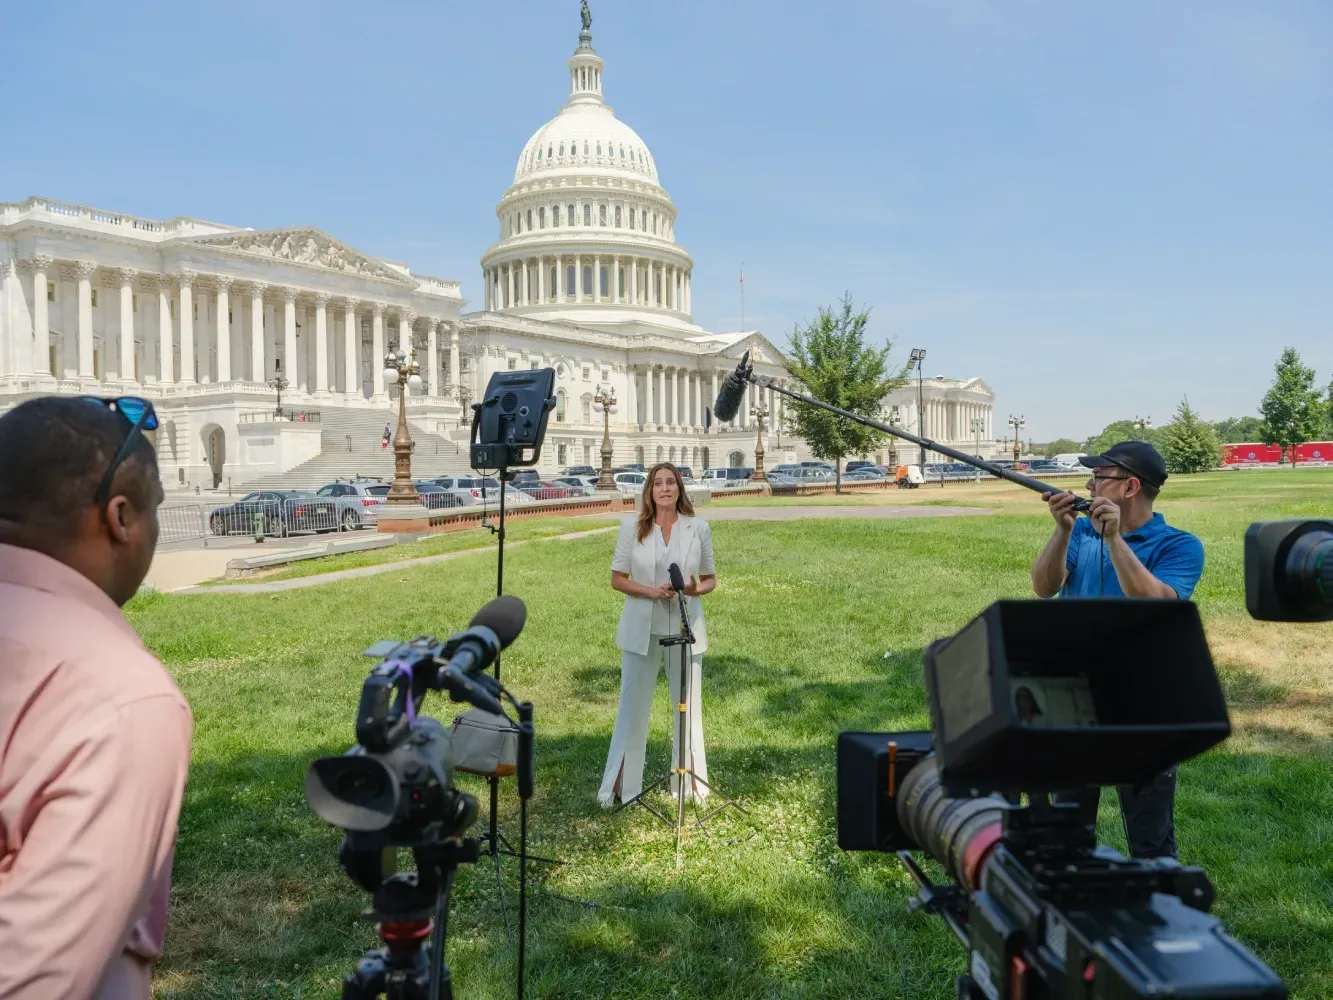
Advanced Team Equipment Suggestion

 - Everything the basic and intermediate team has, but of the highest quality


- Multiple lenses


- Multiple lights


- Multiple advanced microphones


- Backdrops


- Dedicated studio space


- Estimated total cost: $6,000 to $10,000

If and when you decide to create an advanced team for video production, getting the best equipment and setup your money can buy is the way to go. It's almost not a suggestion but are quirement. Why? Because deciding to dedicate an advanced team means you have decided to generate the highest-quality videos possible as part of your long-term campaigns. And because of the dedicated personnel who will be training to maximize their skill set for this, you want to be able to make the most out of their potential. This means giving them the equipment, space, and time to work to the best of their abilities. 


Pros of using an advanced team setup

-DSLR cameras, lenses, lights, and other recording equipment are of the highest quality


- Can produce the best videos possible


- Can adapt to nearly any kind of video shoot or idea-Can create videos at a rapid pace


- The dedicated team utilizes every piece of equipment to its fullest

Cons of using an advanced team setup

-High investment cost


- Equipment is very complicated to use, requires an advanced skillset


- Maintenance and repairs could be costly if the equipment is damaged


- Cannot easily be used by substitutes to the in-house team unless trained prior

What can an advanced team do with such a setup? Everything from commercial-grade videos to multiple smaller-scale videos pumped out at a rapid and regular pace. These videos are suited for anything from traditional media ads to online ads, an online web series, webinars for sale, the list goes on and on. 

Done correctly and used by the right people, the investment is well worth it. It is, however, a significant investment, and as such, should only be for companies serious about making money from videos. The equipment by default is much more complicated to use than the ones for intermediate and basic teams, due to the different options and settings available. As such, it can be difficult to find substitutes who can use the setup if any of the advanced team is unavailable during the production phase. 

But if your team is already big enough, and has the expertise to use the equipment properly then you can rest assured that if the creativity is there, you'll get the best videos you could make in-house. 

The star of this setup is the high-end camera. While a DSLR camera works, getting an actual professional camcorder is the way to go for advanced configuration. Not only does it have multiple functions that a regular DSLR might not have, but the quality of the video is also definitely the best your budget can get. Especially if the camera purchased is capable of recording in 4K quality. 

All of the accessories listed for the intermediate team upgrades to the highest professional-grade for the advanced team. Tripods and gimbals will work wonders for getting a stable shot, whether in a static position or motion. You can even add a track dolly for your camera as a bonus. LED video lights and stands, both for softboxes and umbrellas, produce vibrant light that will illuminate your shots as needed. This is perfect for creating the highest quality talking head videos, webinars, video podcasts, and more. Maximum lighting means very minimal pixelation and graininess when the videos are recorded. 

Just like the basic and intermediate gear set, microphones are essential. Getting everything from wireless lapel microphones to Omni-directional microphones that can eliminate background noise is a significant investment. Getting an overhead boom mic if the budget allows is also great because it increases your capability of recording audio if a shot cannot have any microphones visible. 

When it comes to software, the advanced team setup can still use Adobe Premiere or Final Cut Pro. However, it can also benefit from having more software, such as Adobe After Effects, for creating additional visuals that the video-editing software could not. A regular laptop or desktop can still do the job. But getting a dedicated computer with large amounts of RAM and the best GPU your budget can afford is the way to go. Especially since rendering videos with lots of additional effects can take a bit of time and requires a lot of processing power. 

One last thing that an advanced team can significantly benefit from, even though it doesn't necessarily need it, is a dedicated space. An office with a spare room that can be turned into a makeshift studio can deliver even better videos. How? Closed off from the rest of the work area, this makeshift studio can be permanently set up with lights, tripods, and other camera equipment. This can shorten the time of prepping for a video shoot, which in turn could make video creation faster. Because instead of continually shifting the gear to the recording area and keeping them when unneeded, you can leave everything in the studio, ready to go when needed. Not only that, backdrops, sound insulation, and other items you'd like to add can be placed quickly and left there for use at any time. 

All of these things will significantly enhance an advanced team's capability of creating video content for your marketing strategy. But whether you're looking to get a basic group, intermediate team, or the advanced team going, you will still follow the same process to create your content. It will only vary in scale, frequency, and quality. 


So how does one go about the process of video production with their in-house team?

Pre-production

With your team and setup determined, a video always starts with the pre-production phase. This first of the three significant steps is the longest. It is also the most crucial. Anything decided here cascades down to the last step and can quickly determine whether or not a video is successful. Pretty much a case of an ounce of prevention is worth a pound of cure. 

To ensure a successful pre-production planning phase, several things need to be determined. 

1.) Assign the producer - This person is pretty much the one who is accountable for the entire project. This person's job is to make sure everything necessary to set up the shoot, from the script to the talents, equipment to the location, schedule and planning, and everything in between. It is quite a daunting task, so the best in-house person to assign to this is a seasoned manager and team leader. Even if that person has no prior experience working on video shoots, their expertise in leading and organizing a team is invaluable. Whoever you pick, make sure that they: 

a.) Know that practice makes perfect, so rehearsals are essential before production.


b.) Overestimate the time to account for travel, shooting, reshooting, and post-production editing.


c.) Plan and see the road map of the project.


d.) Are the best team leader you can afford to assign to the video team.

2.) Have the idea and script - All videos need a big concept, storyboard, and script. Even if the said video is a short 30 seconder for an online ad, it's imperative to have this because it will set the tone of the entire process. Not to mention provide the roadmap of everything from location, to dialogue, to even determining who the talents and actors are. The idea and script also determine the other elements of the production, like...

3.) Schedule, milestones, and timelines - Depending on the idea and script, a video can take as short as one day to produce, all the way up to an entire month or longer. The best way to not fall short is to plan the deadline and work from there. Not only does this give you a finish line to visualize, but it also makes it easier to divide the hours, days, or weeks available to you for specific tasks.

4.) The budget - Even if you already have the equipment and a paid team, producing a video still costs money. Have a ballpark figure with some padding to make up for unforeseen costs. The budget will also help you determine if a video is worth making, and provides a target at how much money must be earned back from the video to make a profit.

5.) The talents - These are the people appearing in your video. Most of the time, as an in-house production team, your talents are composed of your existing employees and co-workers in the company. However, casting talents still costs money because they are pulled from their work responsibilities to appear in the video. So this should also betaken into account when fixing up the budget. 

6.)Storyboard - The last thing before production starts is to have a visual storyboard. This is the main roadmap that determines the shot angles. It also gives an idea of how many scenes to shoot, and so on. It doesn't matter if a video is a 30-second short ad or a full10-minute feature; a storyboard is a crucial element to have to ensure there are no mistakes or missed scenes. This seems like a task that is suited for experienced cinematographers or directors; however, if you can imagine it, you can write and draw it. A useful guide is to start with a set up (a wide-angled shot) and finish with mid-range to close-range shots. If you end up being a few seconds or minutes short of the target duration, you can fill in the gaps with stock footage or extra cut scenes at the end during post-production.

Now that your pre-production is setup and ready, it’s time to move on to the production phase.


Production

While it may seem like the most tedious of the entire video production process, the actual production phase is the quickest and shortest of all the steps. It is provided, of course, that the planning goes very well and everything is in order and ready. For example, a Hollywood movie can take just a few months to shoot. But in reality, it could be in the planning phase for nearly a year and will take another year to finish in post-production. The same can happen in your in-house video. You and your team might take an entire week to plan, another week to edit, but only need a whole afternoon to shoot. 

Because it can take a while to set up the equipment needed for your shots (varying depending on what kind of equipment and team you have), it is best to maximize it once finished. Therefore, it is highly suggested that you capture more than what you need. What does this mean? Let's say there is a scene where the main talent says four lines that can be said in many different ways. Shoot that scene over and over, with the talent saying the four lines in the various ways possible. It only takes a few extra cuts and just a bit more time than initially scheduled (though if you overestimated your timeline, this should be accounted for), but the added benefit is substantial. Because those extra shots give you different variations you can use during the final edit, in the event you decide to take a different direction than initially intended. 

Not only that, shooting extra footage gives you your filler footage, instead of relying on stock footage found online, in the event of a shortage. 

But before the shoot starts, make sure you have the following ready to save not just time, but money. You don't want to pull your talents out of their actual responsibilities, only to wait hours on end while the team sets up the equipment and the location. That said, here are some reminders to ensure a smooth video shoot: 

1.) Prepare the equipment in advance - Make sure that at least a day before, all batteries are charged to 100%, all SD cards, and other storage devices are free, and that all pieces of equipment are working as intended. The last thing you want is, on the day of the shoot, find out that a microphone is damaged or a camera lens is dirty or cracked. If you don't have a dedicated studio in-house, mark off the location of the shoot to prevent other staff from passing through. This is most important if you need to set up other items on the site before the shoot. You don't want a staff member to take or move a thing that you will need in your video simply because that person didn't have any warning. Lastly, test the location itself by shooting some test footage. This will help you with the next step.

2.) Set the lighting- If you're using basic equipment, make sure what the location's lighting will support other supplementary lights you have. If you have intermediate gear set with softboxes and umbrellas, set and test them before the shoot itself. You can even pre-set your DSLR with the right exposure, white balance, and color setting during this time so that when the shoot starts, you can go straight to capturing as much footage as possible. If you have an advanced setup complete with your dedicated studio area, then you are freer to play around with the lighting options. You can do many different lighting configurations. For example, doing a three-point lighting setup, which is great for scenes with just one or two talents, is ideal for talking-head videos or vlogs. Todo this, one light is in front of the talents, one light is at an angle to capture the "good side," and one light is at the back.

3.) Test your shot composition and your audio - Shooting a scene with the subject dab-smack in the middle is not always the best option. For the most part, something called" the rule of thirds" is often used by video content creators. What this means is that when shooting a shot, divide the frame into nine segments, done by two horizontal and vertical lines. The subject should go to where the lines intersect, balancing between horizontal and vertical lines. While this isn't a strict rule and has some variations depending on the context of your shot, it can add a professional flavor to your end product. This is because despite it being more a suggestion, everyone from A-list YouTubers to big Hollywood productions use this often. So anyone who sees your video will get that professionally-made vibe. And then, test your microphone setup. Assuming you have external microphones for your team, the audio quality will still vary depending on several factors. If the location has ample open space, such as the work floor or the lawn space outside your building, there will be a lot of audio contamination to deal with. If you are shooting in an office or your dedicated studio, there is a lot more wiggle room for microphones. Make sure that, based on your storyboard, your talents are audible if you have no wireless lapel mics. Although, of course, if they have them, this won't be too much of an issue.

4.) Direct the shooting flow properly - A director's job is to make sure that the shoot goes smoothly and everyone adheres to the storyboard and script. And yet, it is also their job to make the call if what looked good on paper doesn't translate when in reality. Therefore, a director can also make the call to reshoot, or if they are comfortable with the talents, allow them to make suggestions and do their own thing. This will pretty much determine how fast the actual shoot takes because a director's skill is the ability to keep the shoots going and to be able to record a good number of shots for the final step of the process, which is the post-production.

Post-Production

The final step in the production process is where you cut and splice scenes, add special effects, blend the audio, and more.

Out of all the three significant steps, this is the most tedious and takes the longest time. However, there are ways to shorten the process. If you planned well, took the shots according to the storyboard, and have backups and fillers available, this will go much smoother. 

You can make the process even faster and smoother by following these simple steps: 

Organize and prepare everything before you begin - Before you even open your video editing software on your smartphone or your computer, make sure that every asset is sorted and quickly found. Depending on your equipment, you can do this on the spot during the production phase. It makes it easier to check before the production phase ends, as well. And it makes it easier to decide if reshoots are necessary. If they are, then the reshoots can happen on the spot and save a lot of time when post-production hits. 

Create a folder with the project name, create different folders inside that labeled video and audio, and, if needed, create subfolders inside to sort the recordings even further. 

This will make it so much easier to find each scene as you assemble the video altogether. 

Keep it simple and effective, not complicated and artistic - While there is something to be said of special effects, cinematic transitions, and immersive music, your video is for your business, not for a movie award. It can get very tempting for you and your editor to play around and make the video as beautiful as it can be, however, that takes time and even more effort. And both can cost you money. Keep the video simple but effective. Stick to the original idea and script, add a few sprinkles of creativity when able, but don't get too caught up with subtle details that aren't necessary. 

Follow the basic editing process - There are many ways to edit videos, but in keeping to suggestion number 2, all you need are the basics steps—no need to over complicate things. 

a.) Load all the videos and audio files in your video editing software . Organize as necessary, although if you have done this via step 1, all you need is to drag your project folder, and it will appear sorted as you initially did. 

b.) Cut the scene videos as needed. Remove the portions where the director is audible saying "action!" and "cut!", as well as interruptions for whatever reason. 

c.) Splice them all together according to the storyboard . As tempting as it is to get too creative here, stick to the plan to stick to the schedule, and cut down on costs. Be mindful of the target duration of your final output. If you plan on releasing a 30-second ad, but have an entire minute's worth of footage when spliced, cut, and trim as necessary until the required duration. 

d.) Add the necessary effects only. Even for a video project that calls for as many special effects as possible, there is a limit. This is often dictated by the creative brief and script. There are some essentials, however, depending on the requirements. For example, if it is a talking head video, then the talent's name and title must be edited in. If you're doing a webinar that showcases figures, graphs, and images transition in. Splicing two videos at once to support a scene also requires special effects editing. 

e.) Do a final review before rendering . Most, if not all, video editing software allows you to play a rough edit of the final video before it renders into the actual product. Do as many review viewings as needed before rendering to save time. The last thing you want is to render the project quickly, only to find out that you missed something, or worse, made a mistake altogether, and re-render it again. Usually, this is done in the presence of the producer, and most importantly, the boss. Once the boss throws the a-ok, render, and submit! 

There are some additional tips during the editing and final review that you have to check as well to make the best video possible. These include:

Check the audio - Make sure there isn’t any distortion, pops, or background noise.

Correct the lighting, exposure, and color if necessary- Even with the right light and camera settings, it is possible to have differences in color and exposure per scene. Adjust to match everything and make the end product look uniform.

Use the correct transitions per cut - Depending on the context of each scene, you can use either a jump cut, a crossfade, a wipe, and so on to set the mood of the video. 

With your post-production complete, the entire video production process is complete. Your output video's quality depends on several different factors, like your team's experience, their equipment, and of course, the creative idea. 

Know that while there is no fixed formula for creating the perfect video for your exact needs, following our guide can help you create the best in-house videos possible. Whatever the budget, size, and gear set, with the right attitude and idea, you'll be creating amazing video content in no time.


Good luck!!

A close up of a green background with a white border.

Get total clarity on your video marketing and paid media with our $500 dollar fully refundable comprehensive data audit.

Schedule A Discovery Call

 CINESALON NEWS

Call of Dragons video advertisements being made by cinesalon advertising agency
By Shane Yeager 18 Aug, 2023
CineSalon, a DC video agency, partners with China's Lilith Games to grow player base for 'Call of Dragons', a mobile game with 60M+ players and $2B revenue.

POPULAR POSTS

Here are some of the best YouTube file formats and how they affect videos on YouTube.
By Tais Lourenco 29 Apr, 2024
Choose .MP4 with H.264 for top YouTube quality and compatibility. Understanding video formats is key to standing out and engaging your audience.
The best ways business videos help to build a brand, get people to trust your business, and reach mo
By Shane Yeager 28 Apr, 2024
Business videos: Elevate your brand, engage your audience. Let's collaborate for impactful results.
Edit a TikTok video even after posting it. Follow a simple method using a step-by-step procedure.
By Lorena Rocchi 28 Apr, 2024
Mastering TikTok editing sparks conversations and leaves lasting impressions. Enhance your presence with expert techniques. Reach out for professional post-sharing assistance.
How to Photoshop a video, the process, and strategies to get high-quality videos.
By Tais Lourenco 28 Apr, 2024
Unlock Photoshop's video potential: it's versatile for basic edits and creative enhancements. Elevate your projects.
How to Post a YouTube video on Instagram using two simple methods.
By Lorena Rocchi 28 Apr, 2024
Maximize reach: Share YouTube content wisely on Instagram. Use links for Stories or upload directly if eligible; if not, download and post. Need help? Get expert advice on YouTube to Instagram.

Like what you read?

The best thing you can do today is to get started.


If you need a quick quote, fill out the self driven estimator or give us a shout on the form here.

202.810.1949

[email protected]

Share by: